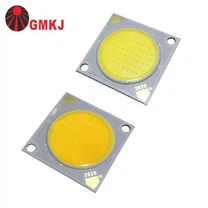
In the process of production, it is always encountered that some of the lamp beads are found to be unable to light up when one, one string, or several strings of lamp beads cannot be lit during the test after mounting. This article will talk about the welding method of LED lamp beads.
Welding method:
First use an electric soldering iron to burn some solder on the positive and negative pads of the lamp beads (the solder must not be too much, otherwise, the positive and negative pads will be connected together when heated with a hot air gun), and then use a hot air gun Heat the positive and negative pads at the same time. After the tin is melted, use tweezers to put the positive and negative electrodes of the lamp beads on the corresponding pads. The operation must be fast and accurate, otherwise, the heat gun will melt the plastic package of the LED and damage it.

In the absence of a hot air gun, different welding methods can be used according to the structure of the LED lamp beads and the substrate used. The SMD LED lamp bead pins are semi-plastic, that is, a small part of the pins are exposed on both sides of the lamp bead. There is also a fully plastic package, that is, the positive and negative electrodes of the lamp bead are all at the bottom of the chip.
It is also easier to solder semi-plastic lamp beads. Also, before soldering, hot tin on the solder pads (the pins of the lamp beads should not be soldered). Use tweezers on both sides to place the positive and negative poles of the lamp beads on the solder pads. Use your fingers or a small screwdriver to press the lamp beads, and finally use an electric soldering iron to quickly heat the exposed electrodes, and at the same time, press the fingers down with appropriate force (when heating, the soldering iron should not be rubbed back and forth, and the pressure on the fingers should not be too large. Otherwise it will damage the lamp beads).
For all-plastic lamp beads, if the light bar substrate is an ordinary circuit board, first use a blade to scrape the paint around the lamp bead pad to expose the copper wire, and then burn a little tin on the pad, and solder the pad first. Then put the soldering iron on the newly scraped copper wire and heat it (not on the pad). After the tin on the pad is melted, use tweezers to place the corresponding electrode of the lamp bead on the pad. Press it, and finally solder the electrode with the small pad. The electrode with a large pad must be soldered first because the heating time is long. If the electrode is soldered later, the lamp bead is likely to be overheated and damaged.

When soldering the lamp beads with an electric soldering iron, the shell of the electric soldering iron must be well grounded, and it is better to wear an anti-static wristband to prevent the LED lamp bead from being damaged by induced electricity and static electricity. In addition, the tip of the soldering iron should be ground into a horseshoe shape to increase the contact area and shorten the welding time.